New Tool Joy and Vintage Sewing Machine Maintenance
First, quick news: As per my thoughts last week, I've made a commitment to putting some time aside for workshop stuff and bought ten days of leave from my employer. It's exciting and kind of scary, not just because it's taking a chunk out of my income but because it means I really don't have an excuse not to be moving things forward with my workshop production.
I then booked Friday as my first workshop day, awaiting it for several days with great anticipation...and on Thursday night the Raspberry Pi I use as a file server, including all my workshop projects, died a death. The data was all recoverable from backups but I spent half of Friday rebuilding and naturally it took the wind out of my sails a bit. Nonetheless, I've made a start on a few projects which I'll tell you more about the next couple of posts.
I had a little collection of random bits to post this week, but I've been distracted by a new love affair :) And it's a nice opportunity to show how, without any specialist knowledge but just working confidently from careful experimentation and observation and some basic principles, you can maintain and even repair a machine you've never really encountered before.
A sewing machine has been on my wishlist for some time - I like to sew and will happily hand sew small items from even tough materials like leather but I'd like to have a bash at modifying or making my own clothes, and I love neat pouches and bags for things so I want to have a go at those too - and as with everything else I'm working with quite limited time so I want to make every minute count.
Because I want to make hard wearing and weatherproof stuff, I want to be able to sew canvas, ripstop nylon and leather, and a quick search of the forums suggests that for tough materials I would be best to get an older sewing machine with all metal parts. So when this vintage BSM machine showed up on Gumtree for only £15 I was extremely excited.
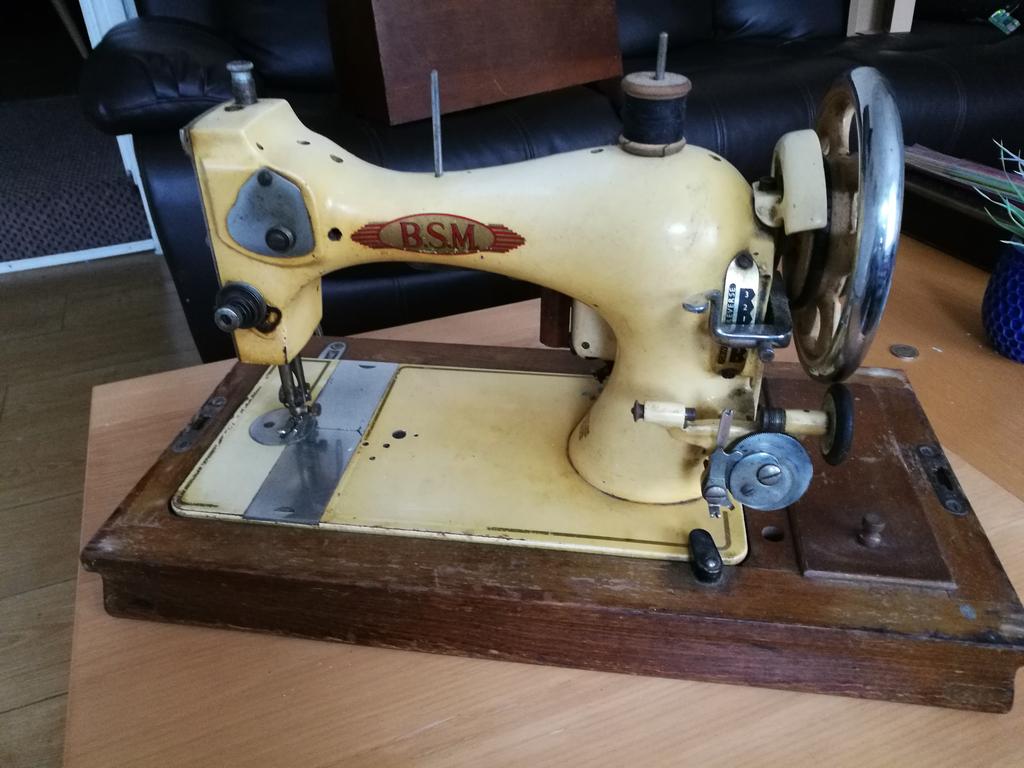
I picked it up this morning from a nice chap called Andy on his storage unit in Hillsborough after a quick inspection and a few hand turns to make sure it was in basic working order, and lugged it home on the bus with some effort as it weighs, by my rough estimate, about 20Kg.

They built them to last in those days - and those days were somewhere between 1939 and 1951, as BSM was an offshoot of the legendary Vickers engineering brand (founded in...wait for it...Sheffield!) which operated briefly as a licensed name during the Second World War and just after.
So, here's how I've gone about checking this machine and getting it in good working order, despite being basically completely unfamiliar with sewing machines since using my mum's equally classic hand crank Singer machine when I was a kid.
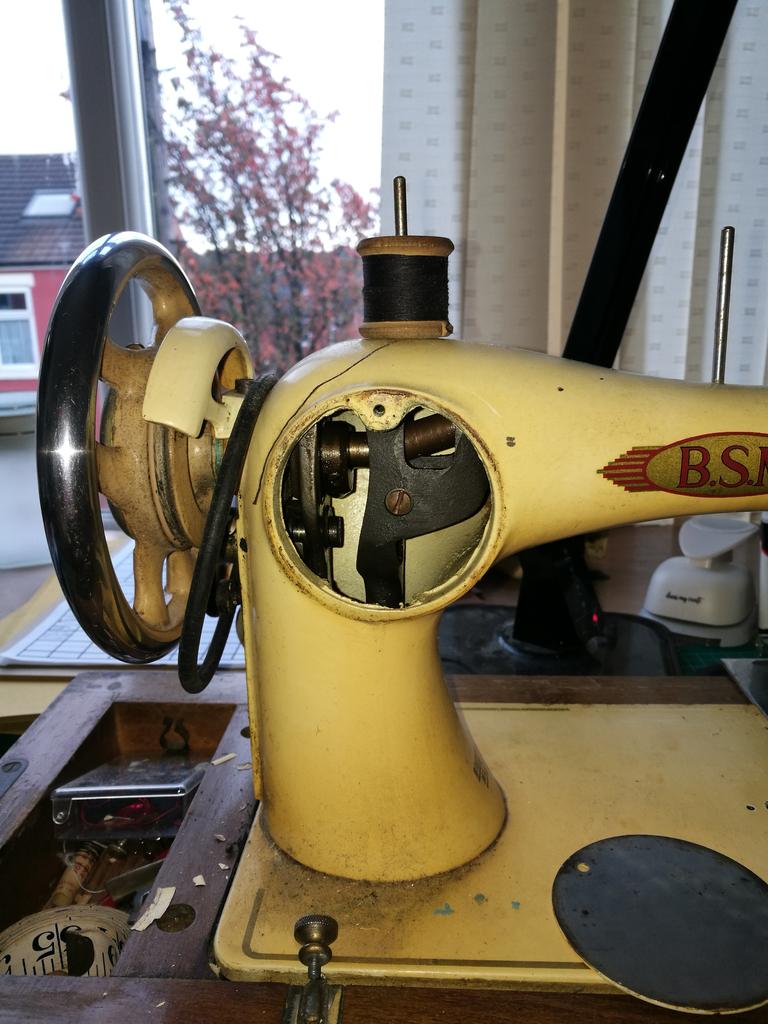
Firstly, like most people I know that the general mechanism of a sewing machine is that the wheel at the back is rotated by hand or by motor, and the machinery inside turns this into an up and down movement of the needle as well as operating various rotating or oscillating parts to feed thread, move the material forward etc.
The first thing I did at Andy's storage unit before handing over my £15 was to give the wheel a few turns. I was looking for the obvious - did the needle go up and down - but I also wanted to see how it felt. It was a little stiff, but what I didn't feel was what would have really put me off buying - a gritty, grinding or grating feeling. That would have indicated that something significant inside the machine was out of shape or broken and rubbing on something else.

Any mechanical mechanism like this needs to turn freely and smoothly; there might be resistance but it should feel smooth. Anything turning at decent speed with grating or grinding inside is going to wear down and break very quickly; that's the feeling of metal parts cutting into each other. Even where it's a matter of needing some oil it should only feel like a rustling rather than a grinding, if that makes sense.
I was bothered by the fact that the resistance was "lopsided" - it was only tight on one side of the wheel, for about a quarter of the turn. That could mean that something like a rod was bent and squeezing up against something else. But I could see that it matched up to the movement of the needle, so in all likelihood it was resistance on that mechanism which only kicked in while the mechanism was moving it.
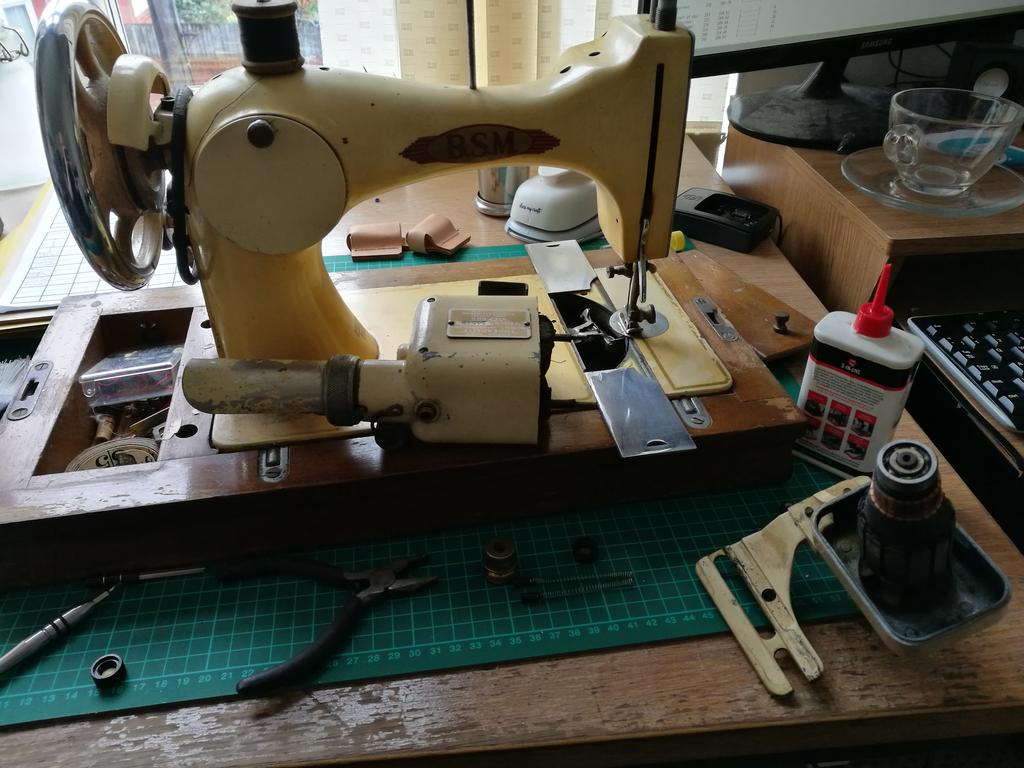
With my new prize home and on the workbench, I give it a good inspect, turning the wheel and watching how all the parts move and trying to get a feel for how it all connects. I know it will need oiling and probably some cleaning, some parts may need tightening or adjusting. It has a motor which is attached by a screw-on bracket, but I have no idea whether it works and Andy has snipped off the power cord quite close to the motor housing because he says it was damaged.
A bit of googling tells me that I can get a generic crank attachment which will almost certainly fit (it seems from the way people talk about the parts as though most of these machines have the same basic layout) for about £10, or a replacement motor with power cord and foot pedal for £35, which I'm not really willing to invest right now, but just the foot pedal can be replaced for £15 and power cord is the same everywhere.
I decide to try attaching a new cord to the motor and see if it runs. I find posts online from people saying that their foot pedal has shorted out (the electricity bypassing the speed control part of the pedal) and the machine runs all the time - the fact that their machines haven't, you know, blown up or caught fire suggests that you can at least briefly run one of these motors with direct current from the wall without hurting it too badly. If it works, I'll know it's worth buying a new pedal. If not, I'll buy the crank attachment and get a motor later on.
But first, the oiling. I know from learning about other machines that this is usually done through specially designed holes which feed the oil to just where it's needed, and there are plenty all over the casing. I add a few drops of 3-in-1 oil into each, turning the wheel so that the parts move and feed the oil where it's needed. I can feel the action get a bit looser right away.

Where possible, I unscrew or release any parts that seem designed to be removed to check how everything moves and if anything needs cleaning, which I do with a stiff silicone brush or a paintbrush for smaller crevices.

As a general principle I know that it's not in the manufacturer's interest for the owners of these machines to damage them by accident, so I can generally assume that it's going to be difficult to do something to it which can't be reversed. Planned obsolescence is definitely a thing, but I don't believe it's as common as we tend to assume, and letting people break their machines isn't a great way of doing it.
Also, older machines in particular tend to be built to be repaired and maintained fairly easily because it used to be expected that if they owned valuable machinery people would learn about how it worked and maintain it - before cheapness and speed of production became more important than durability and maintainability.
I am, however, reminded why you should clean before you oil, as I have to brush a lot of oil-sodden lint out of various cavities. Every day's a school day.

It's a beautiful mechanism - everything designed elegantly to be hardwearing and as efficient as possible. It's really satisfying just unpacking how it all works together. There's very little real wear on it apart from two rubber parts which are a bit perished and cracking.

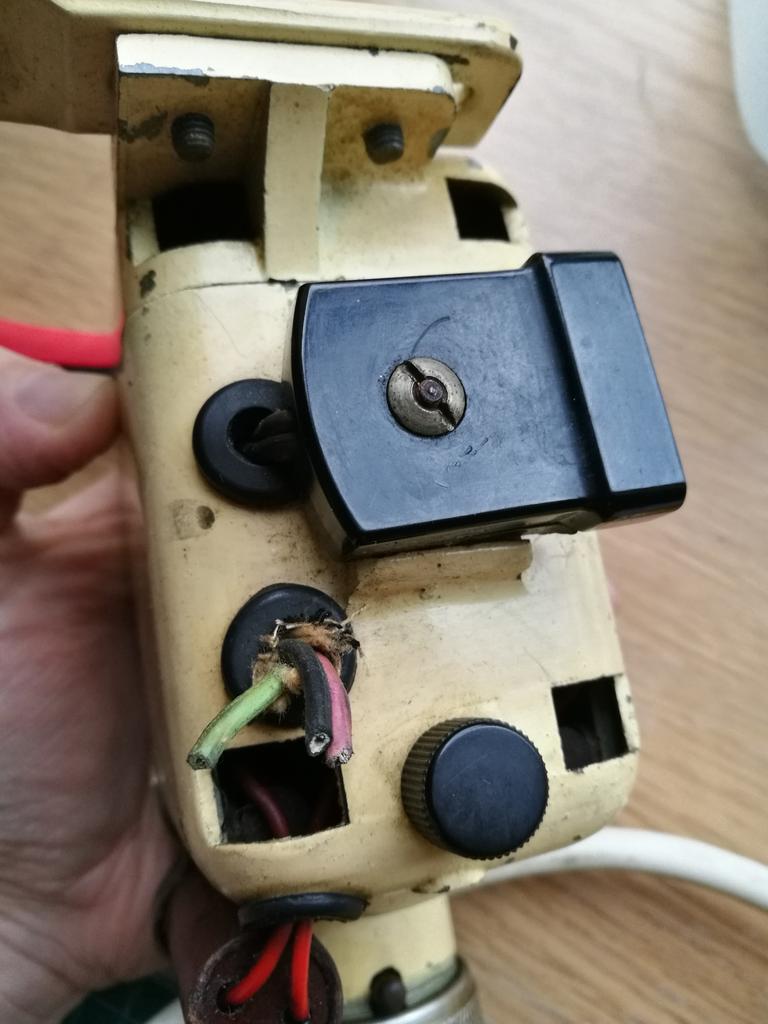
Next, the motor. I need (I assume, again from looking at other types of electrical devices) to get inside the casing to find where the cord attaches and replace it. In most modern devices the ends of the three wires inside the cord would be attached somewhere inside the motor housing, probably with small screws or clamps, so I need to find those.
I'm hoping for a nice easy access panel but the motor is built more like a capsule which splits into two parts. The end is held on by two small dome nuts which come off easily, and with a bit of leverage the end of the casing comes away. Slightly to my surprise and a little dauntingly, the whole central rotor of the motor comes out with it.


It's actually really cool being able to separate out the motor like this, but I'm a bit worried about getting it back together (never opened up a motor before) - particularly as inside I can see two springs have sprung out and now extend across the casing, preventing it going back in.

I know from lots of Youtube videos about dismantling motors, particularly by AvE, that these are the "brushes" which transfer power to the rotating part of the motor, and fortunately each one has a little "access cap" which allows it to be removed because the soft carbon tips wear down over time and need to be replaced, so I can pull them out and put them back in once the rotor is back in place.


The end of the rotor is held in a bearing to let it rotate freely - the grease is a little grungy but I turn it and again feel no grating or grinding, or resistance that would suggest any of the ball bearings inside have been worn down (again, something I know about from AvE videos).

Unfortunately, there doesn't seem to be an easy way to replace the power cord - looking inside, it looks like the wires from the cord attach directly to parts of the motor instead of terminals that can be unscrewed. I'm going to have to join the short stubs of the wires to a new cable outside the casing. Oh well. Everything else looks in decent order and I'm hopeful that the motor will run okay; I reassemble it.
With the oil having had a bit of time to work the machine is now spinning quite nicely with minimal resistance, and having explored its workings I'm even more excited about owning this beautiful machine. As they say, you don't really own it if you can't repair it, and I'm reasonably confident I can repair and modify this machine however I need to. Next I'll attach a power cord, test the motor and see whether I'll be hand cranking my first sewing project or enjoying motorised sewing luxury :)
See you soon!