Handmade Quick Daily Journal - Part 1: Research and Development
I've never really been able to stick with a journalling habit consistently, although I've generally enjoyed it for a while whenever I've tried it.
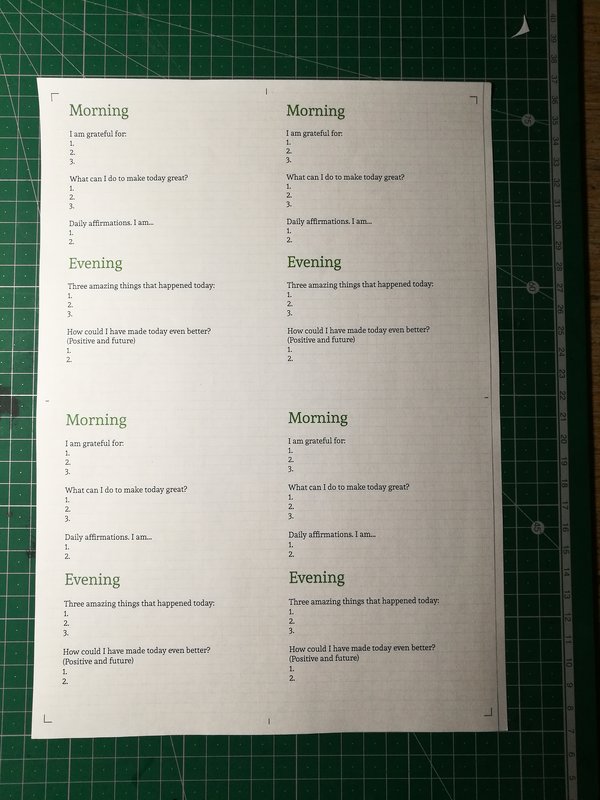
I have, however, had very good results from the 5 Minute Journal - a quick mindfulness journalling exercise based around a set of well-written, structured questions. I copied the questions into text files and filled them in morning and evening for a long time, and they genuinely brought me a lot of joy and awareness and improved my headspace noticeably.
As my daily routine changed, I decided I wanted to avoid turning on the computer first thing in the morning and keep my head out of screen space until I left for work, so I wanted a physical journal to fill in. At the time, however, I had very little disposable income and I wasn't willing to pay the exorbitant price of over twenty pounds for each six month journal, so I decided to make my own.
Like most projects, I first sat down and defined the parameters the journal would have to meet to make me really happy with it. It had to be smart-looking and durable, a satisfying object to hold and use so I would be motivated to pick it up and fill it in.
As I've mentioned before, I love the elegantly simple Field Notes notebooks, and I decided I would crib some of the elements that make them so satisfying for me - the stiff card cover with rounded corners, the convenient size and form factor, the use of bold clean fonts and (in my personal preferred variant) the gridded pages. I wanted to introduce some colour though.

First, I had to figure out a page design that would be aesthetically pleasing and ideally printable without going to a commercial copy shop. Unfortunately my cheap home inkjet wasn't able to print clean gridlines as thin as I wanted them, but luckily I was working at the time in a college print room with access to a decent colour laser copier, and after a lot of experimentation I found a thickness and saturation that would print fine, faint gridlines.

I picked a nice, clean and readable font with a bit of personality - Andada, from the great free selection at Fontsquirrel - and experimented with text size and grid spacing until the headers and questions lined up nicely, then carefully noted down all the details so I could recreate them later if needed.


For ease of aligning the covers and pages, I decided to print two notebooks to a page with plenty of bleed (extra space around the edges), bind them as one block then separate them and trim them to size.
In the print shop I had access to a big heavy duty powered guillotine which sliced them beautifully, but again I wanted to be able to make these at home in future (once I had a printer that was up to the job). This guide from Big Jump Press gave me a technique and confidence for cutting clean sections of a booklet by hand (I actually use the "lift one leg" trick for all kinds of cutting now).
Calculating the thickness a saddle stapler could handle and trying out different card thicknesses and combinations of pages, I figured out I could combine a 270-300gsm card cover with 16 sheets (ie 32 sides), to make a pair of two month journals with each printing.
The last detail was the rounded corners. While a big punch press would be convenient if I was making these in bulk, I found a very affordable hand punch made by Docrafts which was more than adequate for an occasional run.

...and it has the added advantage that when my little nieces come over for a film session, they can give everyone their cinema tickets and clip the corners, which is very exciting ^_^

This is already a day late and I've got Brussel sprouts to roast for dinner (and inadequate photos right now), so in part 2 I'll show the whole process of putting together a booklet.
See you soon!